Get a quote
555-555-5555
mymail@mailservice.com

8 Steps for DIY Lawn Restoration

Yolanda Esparza • Apr 24, 2024

Turning Your Bad  Lawn into a Healthy Oasis

A lush green lawn in front of a house with a red door.

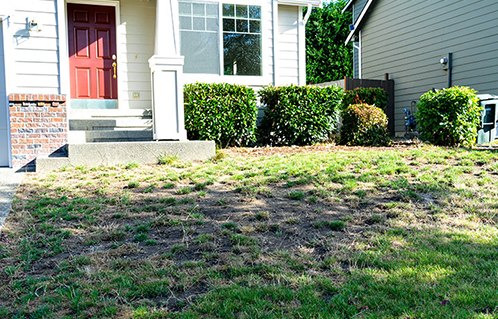
Are bare spots, dead grass, and a yard full of weeds making you want to start fresh but unsure where to begin? It can be overwhelming to imagine restoring your lawn, but with some effort and time, you can transform it into the lush green paradise you desire. Don't lose hope - with a bit of do-it-yourself work and patience, you can rejuvenate your lawn and create the beautiful green oasis you've always dreamed of. Ready to turn your weedy lawn into a vibrant, healthy expanse of green? Let's get started on the journey to revitalizing your lawn.

Digging Deep: Uncovering the Root of the Problem

A person is using a lawn mower to remove weeds from a lawn.

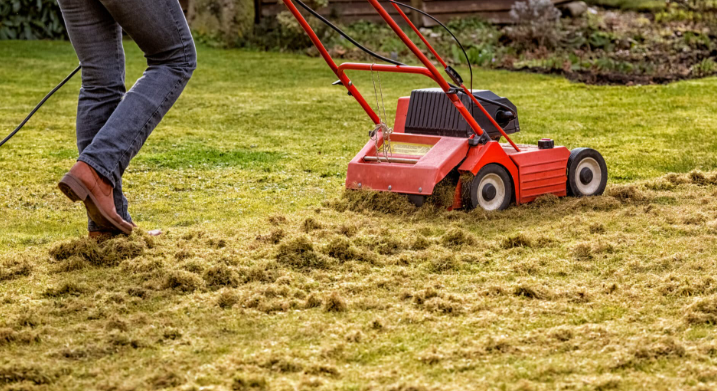
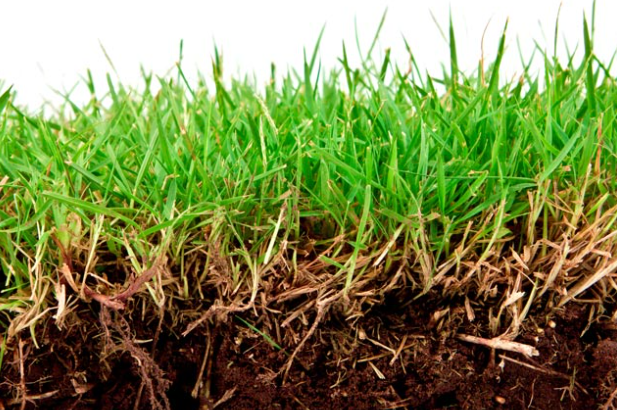
Begin the process of restoring your lawn by dethatching, which involves removing the thick layer of grass clippings and organic material known as thatch that can suffocate your grass by preventing proper airflow and nutrient absorption. Take a shovel and cut out a triangular plug of grass that is a few inches deep to check the thickness of the thatch layer - if it measures up to an inch, then it's time to dethatch. This task is ideally done in the spring or fall seasons for optimal results.

Smooth Out Your Yard for Safety and Satisfaction

A lush green lawn with a tree in the middle of it.

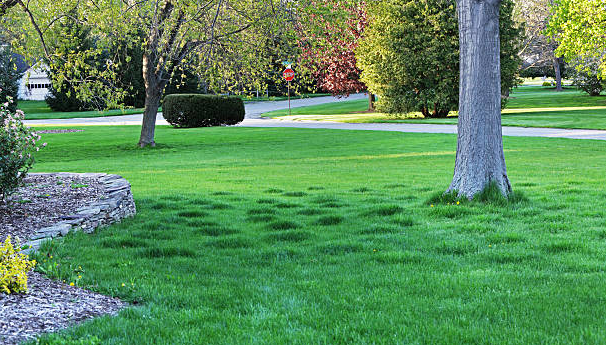
All those bumps and divots in your yard can be frustrating and even hazardous, causing potential ankle injuries. Fortunately, they are both manageable issues that can be easily addressed as part of your lawn restoration project. By taking the time to level out uneven surfaces and fill in holes, you can create a safer and more visually appealing lawn that you and your family can enjoy.

Restoring your lawn: fixing depressions and uneven surfaces


A person is raking the grass with a rake.

For small divots, apply topsoil and compost, then use a landscaping rake to ensure a smooth and level finish. For larger depressions, remove the sod, fill with a combination of soil, compost, humus, and fertilizer, then reapply the sod and press it down firmly. Be sure to water the repaired areas afterward.

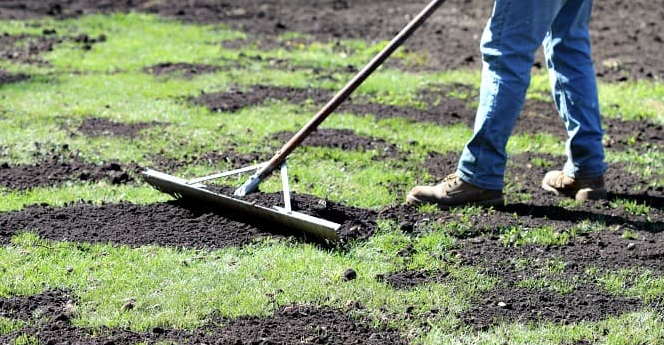
Addressing Uneven Terrain

There is a lot of grass in the middle of the field.

To fix the uneven terrain, carefully cut out a 2’x2’ section of sod and remove the excess dirt beneath it. Add compost and soil, thoroughly moisten the area with a hose, and then re-cover it with the removed sod. Use the remaining dirt to fill in the gaps around the patch edges for a seamless blend.

Testing Your pH Levels

A person is holding a shovel and a card that says ph test

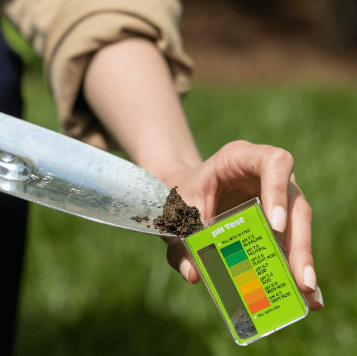
Looking to bring your yard to life? Establishing a strong chemistry between you and your soil is key. Start by testing the pH levels of your soil - if they are too high or too low, essential nutrients may struggle to reach your grass. You can easily do this at home with a pH soil tester from a home and garden center, or opt for professional lawn care services for a more thorough assessment.

Nourish Your Lawn

A person is spreading fertilizer on a lush green lawn.

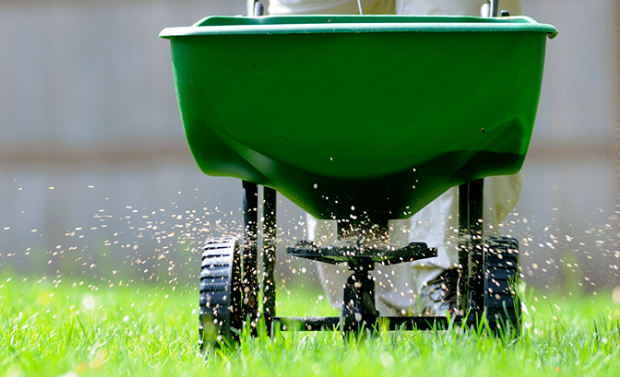
Fertilizer plays a crucial role in revitalizing and nourishing dehydrated lawns. To effectively restore your lawn's health, opt for a slow-release fertilizer and mindful application. Excessive use of fertilizer can result in nitrogen burning, disease, or contamination of stormwater, emphasizing the importance of careful dosage. If you previously conducted a soil test, adhere to the recommended fertilizer type and quantity. In the absence of a soil test, select a slow-release fertilizer with a balanced nitrogen-phosphorus-potassium ratio of 3-1-1. Prior to seeding your yard for lawn renovation, supplement with fertilizer one week in advance and ensure it is adequately watered into the soil for optimal absorption and effectiveness.

Nurture Your Microscopic Allies

A close up of a patch of grass and dirt on a white background.

Your yard is a vibrant ecosystem teeming with billions of beneficial microbes and microorganisms in every pinch of soil. By providing them with nutrient-rich soil containing 2–5% organic material, you can support their efforts to rejuvenate your lawn and maintain its lush, green appearance.

Breathe New Life Into Your Lawn

A lush green lawn with a yellow house in the background.

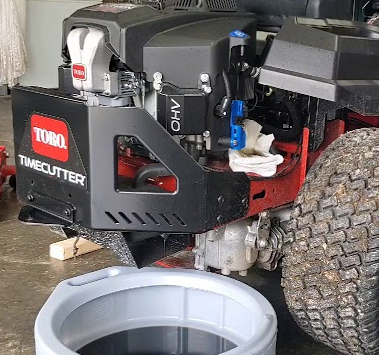
Revitalize Your Neglected Lawn with Core Aeration: Some lawns are truly deprived of the care and oxygen they desperately need to thrive. By using a core aerator on your yard, you can create essential space in the soil for grass roots to establish a deeper foundation. This process allows for better absorption of nutrients, fertilizer, and organic matter, setting the stage for a vibrant, lush lawn to flourish.

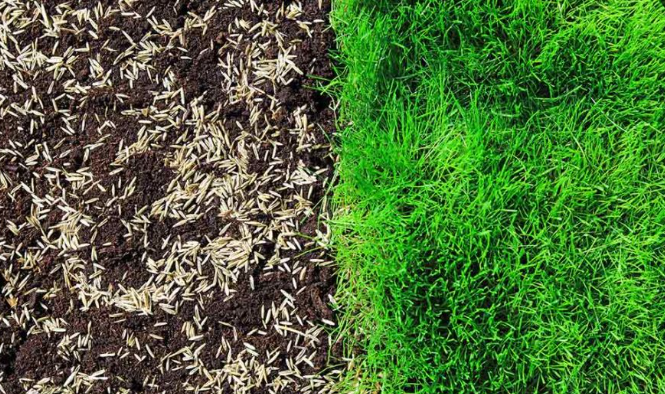
How to Properly Seed Your Lawn for Optimal Growth

A person is holding a pile of grass seeds in their hands.

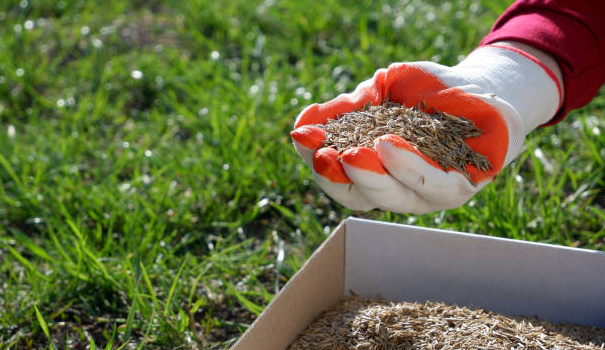
Enhance the sowing process by evenly spreading grass seed by hand or with a broadcast spreader across your lawn. For a more efficient method, utilize a slit-seeder to create small openings in the soil and automatically plant the seeds. Prepare your lawn by dethatching to reveal the soil, and ensure it is adequately watered before sowing. Begin seeding at the perimeter of the lawn, dividing the seed and applying it in two directions. Lightly cover the seeded areas with compost and topsoil. The timing of overseeding should be based on the climate and region where you reside.

Northern Climates

A close up of a field of green grass on a sunny day.

For optimal results, consider overseeding your lawn during the late summer or early fall. This timing will allow the young grass seeds to germinate, develop strong root systems, and store vital nutrients for the following spring. By taking these proactive measures, you can ensure a lush and healthy lawn for the upcoming seasons.

Southern Climates

A close up of a patch of grass next to a patch of dirt.

To promote robust growth and nutrient storage in your lawn, it is recommended to overseed during the early summer months. This timing allows the grass seeds to establish deep, strong root systems just in time before the arrival of fall. By overseeding at this time, you can ensure that your grass will be better equipped to withstand the challenges of the upcoming seasons and maintain its health and vitality.

Maintain Your Lawn with Care and Attention

A close up of a sprinkler spraying water on a lush green lawn.

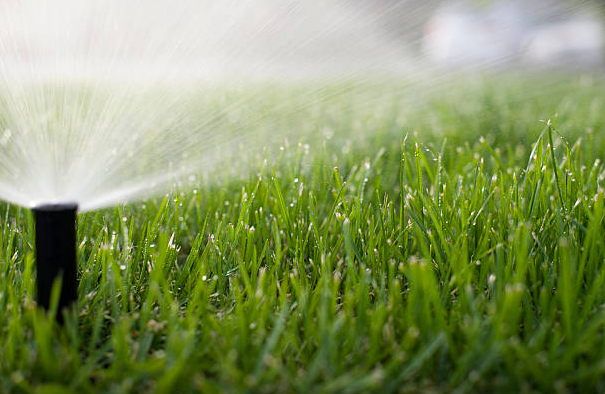
Restoring a lush, healthy lawn requires ongoing care and attention. To accelerate the germination process after overseeding, it is recommended to lightly mist the yard for 5 to 10 minutes in the morning and afternoon, increasing it to twice a day as needed. Within four to six weeks, your new grass should reach a height of about two inches, indicating successful growth. Once the grass has matured, it is safe to resume a regular watering schedule and consider a second round of fertilizer, following the manufacturer's guidelines. When the grass reaches three to four inches in height, you can begin mowing, ensuring that your mower blade is sharp to avoid damaging the young grass. By following these eight simple steps diligently, you can achieve a vibrant, green lawn in no time. Your commitment to proper lawn care will be rewarded with beautiful, lush grass that you can proudly enjoy.

For more lawn tips and tricks click here or give us a call at 580-886-2345 for more information on what lawn equipment is best for your lawn!!

Contact

For More Information Regarding this mower please get in touch with our digital team below, or come and see us in store at one of our 5 locations. We like phone calls too!

Contact Us


Don't be a stranger!

M&d Enterprises & The LawnMower Shops On Maps

A toro timecutter lawn mower is sitting in a garage next to a bucket of oil.
By Yolanda Esparza 02 May, 2024
Keep your mower deck operating at its best with these easy maintenance tips. Consistent maintenance not only extends the lifespan of your equipment but also ensures that your lawn looks its best throughout the entire season.
A wood pellet grill is sitting on a patio next to a brick wall.
By Yolanda Esparza 26 Apr, 2024
Traeger grills are expertly crafted to elevate your cooking experience, providing both convenience and enhanced flavor. Equipped with precise temperature controls and the ability to monitor temperatures remotely from your phone, achieving delicious meals every time is easier than ever. If you find yourself struggling to achieve perfect results, you may be falling victim to some common grilling mistakes. Let us guide you through what to do, and more importantly, what not to do, to ensure a successful grilling experience.
The chicken is wrapped in tin foil and covered in barbecue sauce.
By Trina Dunkin 24 Apr, 2024
Massage your chicken breasts with a smattering of spices, grill them hot and fast, and mop them with a mix of Traeger BBQ sauces for perfectly tangy chicken.
A steak is sitting on top of a wooden cutting board with vegetables.
By Yolanda Esparza 18 Apr, 2024
Indulge in the ultimate food experience with our complete steak guide, guaranteed to elevate your cooking skills to new heights. Say goodbye to mediocre meals and hello to perfectly cooked steaks every time with the help of your trusty Meater. Celebrate food month in style and savor the flavor of a perfectly cooked steak like never before. Dig in and get ready to impress your taste buds with our foolproof steak guide.
A garden with a watering can , pots , a hat , and a basket of flowers.
By Yolanda Esparza 05 Apr, 2024
As spring arrives, the weather varies across different regions, impacting your gardening plans. While some areas may already be planting this month, in other places it's still too early. Nonetheless, there are plenty of tasks to tackle in your garden this month, whether you have a large yard or a small patio garden. Tasks like pruning, transplanting, and dividing fall-blooming perennials should be on your to-do list , along with setting up trellises and adding compost to your garden beds. Before you dive into these tasks, it's essential to consider your agricultural zone and ensure it is the right time for these activities. If your ground is still frozen, it's best to wait a few more weeks to avoid any potential damage.
A person wearing orange gloves is working on a red lawn mower.
By Yolanda Esparza 01 Apr, 2024
After your outdoor power equipment has spent the winter in storage, it is important to perform some maintenance to ensure everything is in top shape for the spring season. In this blog, we will cover the essential maintenance tasks for these four key outdoor power tools: Riding Mowers, Walk Behind Mowers, Leaf Blowers/Vacs, and Trimmers. As you inspect each piece of equipment for maintenance requirements, be sure to pay attention to these critical factors to determine whether your equipment is ready for spring or needs some care. Remember, now is the perfect time to schedule preseason maintenance or repairs for your power equipment at a local dealer to beat the rush and ensure your equipment is in top-notch condition when you need it.
By Trina Dunkin 29 Mar, 2024
This easy-to-make favorite is rolling with Traeger’s signature wood-fired flavor. Serve this sweet treat for breakfast or dish it out for dessert. Prep Time 1 HR 30 MIN Cook Time 20 MIN Pellets PECAN SERVES 8 INGREDIENTS MAIN 1/2 Ounce (2 packets) active dry yeast 1/3 Cup plus 1 teaspoon cane sugar 1 Cup warm water (110°F to 115°F) 5 Cup all-purpose flour, plus more as needed 2 Teaspoon Salt 1 Cup warm milk (110°-115°F) 1 Large eggs As Needed oil 1/2 Cup butter, softened 1 Cup brown sugar 2 Tablespoon cinnamon CREAM CHEESE ICING 4 Ounce cream cheese, room temperature 1/2 Cup butter, room temperature 2 Cup powdered sugar 1/2 Teaspoon vanilla 1 Teaspoon milk Pinch Salt STEPS 1 Place the yeast, 1 tsp of sugar, and the warm water in a mixing bowl or the base of a stand mixer. Stir to combine. Allow the yeast to proof for 5 minutes, it should start to bubble a bit, showing that the yeast is indeed alive. 2 Sprinkle the flour, salt and remaining 1/3 cup sugar over the yeast mixture. Using a dough hook or wooden spoon, stir for 30 seconds. Pour in the warm milk and egg. 3 Knead again on the medium-low setting, or on a floured work surface by hand until the dough is very soft, adding up to one more cup of flour so the dough is soft and smooth and has lost its sticky quality. 4 Coat the bowl with a small film of oil and place the dough in the bowl, turning to coat the dough evenly with oil. Cover the bowl with a clean cloth, place in a warm spot in the kitchen and allow to proof, about 45 minutes. The dough will have almost doubled in size. 5 In a small bowl combine the softened butter, sugar, and cinnamon. 6 Punch down the dough and roll out into a rectangle on a floured work surface. 7 Spread the cinnamon butter mixture over the top of the dough and roll up into a log. 8 Cut the dough into rolls about 2" thick. Transfer rolls to a buttered baking dish or cast iron and lightly cover with a kitchen towel. Let the rolls rise again until doubled in size. 9 When ready to cook, set the temperature to 325℉ and preheat with the lid closed for 15 minutes. 10 Place the baking dish or cast iron directly on the grill grate and bake the rolls until lightly browned, about 20 minutes. 11 For the Icing: place cream cheese and butter in the bowl of a stand mixer fitted with a paddle attachment. Mix together on medium speed until combined. Reduce the speed to low and add in the powdered sugar slowly. Add vanilla, a pinch of salt and milk and mix to combine. 12 Remove the rolls from the grill and spread icing on top while the rolls are still warm. Enjoy! To take a look at our Traeger lineup click here !!
A sidewalk surrounded by flowers and plants on a sunny day.
By Yolanda Esparza 26 Mar, 2024
Ornamental grass is gaining popularity for its hardy nature, visual impact, and benefits to local wildlife. Unlike traditional grass, ornamental grass comes in a variety of heights and colors, making it a versatile option for landscaping, hardscaping, and potted plants. If you're considering planting ornamental grass, we'll discuss important details to consider and the minimal care needed to keep it thriving.
a lush green lawn's grass blades
By Yolanda Esparza 24 Mar, 2024
Here are some tips to help revive your lawn and make it look greener and healthier. The first step is to carefully rake and dethatch. When raking, it’s important to wait until the grass is dry to avoid causing damage. When dethatching, be sure to remove any excess thatch or dead material from your lawn, as a layer thicker than an inch can prevent nutrients and water from reaching your grass. It’s important to work gently to ensure that your lawn can receive the nourishment it needs.Next, it’s crucial to aerate your lawn to improve the circulation of air, water, and nutrients to the soil and roots. Aeration can be done using a pitchfork or a specialized tool called a lawn aerator. This process helps to relieve compacted soil and promote healthy root growth.
a person is grinding a piece of metal with sparks coming out of it
By Yolanda Esparza 20 Mar, 2024
In this blog, we get into the important topic of maintaining your mower blades for optimal performance. From understanding the ideal sharpness level of your blades to the best practices for sharpening and balancing, we provide valuable insights and tips for every lawn care enthusiast. Whether you are a beginner or a seasoned pro, our guide will help you navigate the dos and don'ts of blade maintenance, ensuring your lawn stays looking its best all year round.
More Posts
Share by: